This post contains affiliate links. If you download a pattern through them, I may earn a small commission at no extra cost to you. Thank you for supporting Little Amigurumi Studio!
You finish a small amigurumi ball, start the last rounds, and a little gap appears where the decreases are. The invisible decrease crochet technique is the usual fix. It closes the shape with almost no hole, so the stitches look smooth and even, and it is easy to learn once you have done it a few times.
This guide explains what an invisible decrease is, how it differs from a regular decrease, and how to work it step by step in US terms. You will also see how to read “inv dec” in a pattern, how to close the last round neatly, and which mistakes to avoid. At the end are three patterns from my collection where you can practice.
What Is an Invisible Decrease in Crochet?
A decrease turns two stitches into one. In amigurumi you use decreases to make a shape smaller, for example to close the top of a head or a ball. There are two common ways to make a single crochet decrease:
- Regular decrease (sc2tog). You insert the hook under both loops of the next two stitches. It is simple, but it can leave a small gap or bump, and the stitch often looks slanted.
- Invisible decrease (inv dec). You work only into the front loops of the next two stitches. The decrease sits lower and flatter, so on a stuffed toy it blends into the fabric.
The difference is most visible on small pieces and tight stitches, where stuffing can show through any gap. That is why many designers ask for the invisible decrease in amigurumi patterns.
| Regular decrease (sc2tog) | Invisible decrease (inv dec) | |
|---|---|---|
| Where you insert the hook | Under both loops of the next two stitches | Into the front loop only of the next two stitches |
| Result | Can leave a small gap or bump | Flatter, blends into the fabric |
| Best for | Quick projects, thick yarn | Small, tightly stuffed pieces |
| Stitch count | Two stitches become one | Two stitches become one |
Before You Start
- Use the right hook. Amigurumi is usually worked with a hook smaller than the yarn label suggests, so the fabric is tight and the stuffing does not show. Check the pattern for the recommended hook.
- Mark the start of each round with a stitch marker. Decreases change the stitch count, so it is easy to lose your place.
- Know the terms. This guide uses US terms, where the basic stitch is a single crochet (sc). In UK terms the same stitch is a double crochet. If you are not sure, see my guide on how to read an amigurumi pattern.
How to Work the Invisible Decrease, Step by Step
These steps make one invisible decrease, which uses two stitches and gives one:
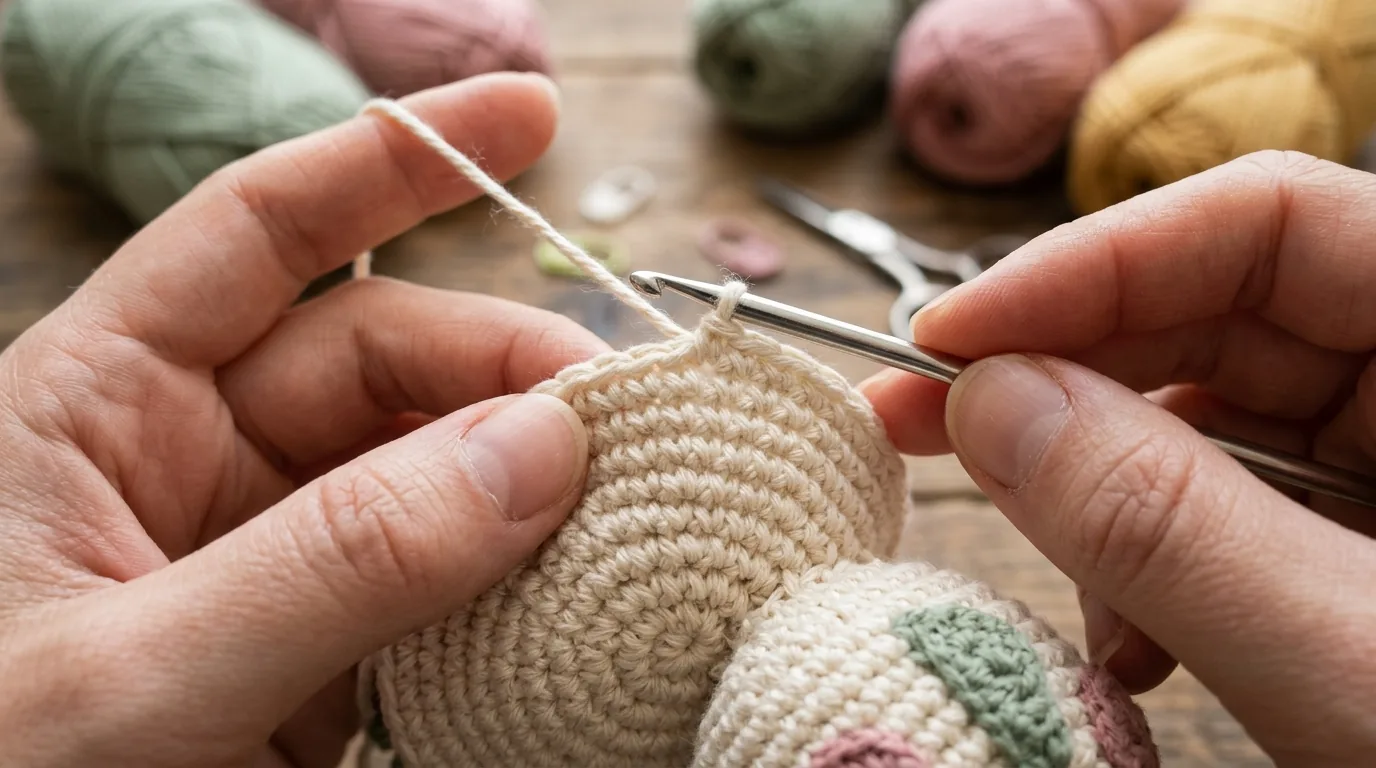
- Find the front loops. Look at the next two stitches. The front loop is the one closest to you, the “V” strand facing you when you look at the top of the round.
- Insert the hook into the front loop only of the first stitch.
- Insert the hook into the front loop only of the second stitch. The hook now passes through two front loops, one after the other.
- Yarn over and pull through the two front loops. Two loops remain on the hook.
- Yarn over again and pull through both loops on the hook. The decrease is finished.
Take your time with steps 2 and 3. Make sure the hook goes into the front loops, not under the whole stitch, and the decrease will lie flat.
How to Read “Inv Dec” in a Pattern
Designers write the invisible decrease in a few ways. Check the abbreviation list at the beginning of your pattern, because it tells you exactly what the designer means.
| You may see | Usually means |
|---|---|
| inv dec, invdec | Invisible decrease |
| dec | A decrease. It can mean a regular decrease or an invisible one, so check the notes. |
| sc2tog | Single crochet two together, the regular decrease |
| FLO | Front loop only |
If a pattern only says “dec”, you can usually use the invisible decrease. Many crocheters do, because it looks neater on stuffed pieces. Follow the stitch count in parentheses and you will stay on track.
An Example Round
Here is a simple made-up example. It is not taken from a specific pattern, but it follows the usual structure.
| Line | What it means |
|---|---|
| R1: *sc 2, inv dec* x6 (18) | Start with 24 stitches. Work two single crochets, then one invisible decrease, six times. Each repeat uses 4 stitches and makes 3, so 24 becomes 18. |
| R2: *sc 1, inv dec* x6 (12) | One single crochet, then one invisible decrease, six times. Each repeat uses 3 stitches and makes 2, so 18 becomes 12. |
| R3: inv dec x6 (6) | Six invisible decreases in a row. Each one uses 2 stitches and makes 1, so 12 becomes 6. |
After round 3 you have six stitches left. This is the point where you stop to stuff the piece and close it.
How to Close the Final Round
Once only a few stitches remain, you can close the piece without a gap:
- Add the last bit of stuffing before the opening gets too small. It is hard to add more afterwards.
- Cut the yarn, leaving a tail of about 6 inches (15 cm), and pull the end through the last loop.
- Thread the tail onto a yarn needle. Pass the needle through the front loop of each remaining stitch, going around the opening.
- Pull the tail gently but firmly. The opening closes like a drawstring.
- Push the needle through the center of the piece to the other side, pull the tail, then trim it close so it hides inside the stuffing.
Common Mistakes and How to Fix Them
- Gaps or holes. Often the hook went under both loops. Undo the decrease and make sure you use the front loops only.
- Loose, uneven stitches. Pull the working yarn a little firmer on the second pull through. The decrease can look loose if you do not tighten it.
- Wrong stitch count. Count at the end of the round. If you have one stitch too many, you may have skipped a decrease. If you have one too few, you may have decreased twice.
- Stuffing shows through. Use a smaller hook, or add stuffing in small pieces so the fabric is stretched evenly.
Patterns to Practice Decreasing
When you are ready to try the technique, here are three PDF patterns on Creative Fabrica with round, stuffed shapes. The descriptions come from my pattern roundups. Check each product page for the exact materials, abbreviations and terms before you buy.
1. Christmas Ornament Set: Nutcracker, Gnome, Gingerbread Man & Mouse
Four mini ornaments in one download, each around 3 in tall. Small pieces show gaps easily, so they are a good place to practice a neat decrease.
2. Santa Gnome Ornament
A little gnome about 6 in tall with a red pointed hat, a fluffy white beard and a soft brown body. The pointed hat is a nice example of shaping with decreases.
3. Christmas Tree Gnome
A gnome whose tall green hat looks like a mini Christmas tree, decorated with small beads, tiny snowflakes and little stars. A smooth hat shape starts with clean decreases.
Want more ideas? Read my guide to crochet Christmas ornaments and learn how to crochet a magic ring, the other basic skill for round amigurumi. You can also browse my roundups of amigurumi animal patterns.
Frequently Asked Questions
What is the invisible decrease in crochet?
It is a way of working two single crochet stitches together by going into the front loops only. It gives a flatter, neater result than a regular decrease and is common in amigurumi.
Does an invisible decrease count as one stitch?
Yes. It uses two stitches and gives one stitch, just like a regular decrease. That is why the stitch count in parentheses at the end of the round goes down by one for each decrease.
Can I use the invisible decrease when the pattern says “dec”?
Usually yes. Both decreases turn two stitches into one, so the stitch count stays the same. Check the pattern notes in case the designer asks for a specific kind.
Is the invisible decrease only for amigurumi?
No. You can use it anywhere you work single crochet in the round, but it is most popular for amigurumi because tight, stuffed pieces show every gap.
Why does my decrease still show a hole?
Check that your hook goes into the front loops only, that your yarn tension is not too loose, and that your hook is not too big for the yarn. A smaller hook makes the fabric tighter.
Happy crocheting!
1 thought on “Invisible Decrease Crochet: Step-by-Step for Amigurumi”